How to Find Reputable Cleaning Companies
September 3, 2026Move Out Cleaning Checklist for Renters: 2026 Guide
September 5, 2026
Table of Contents
- What You’ll Need to Clean Office Desks Efficiently
- Step 1: Clear the Desk and Sort Your Belongings
- Step 2: Dust and Clean Surfaces With the Best Cleaning Supplies for Office Furniture
- Step 3: How to Disinfect Computer Keyboards and Mice
- Step 4: Tackle Stains and Spills on Different Desk Materials
- Step 5: Organize Cables and Accessories to Prevent Clutter
- Your Daily Office Cleaning Routine for Lasting Results
- Common Mistakes to Avoid When Cleaning Desks
- Frequently Asked Questions
Last Updated: September 4, 2026
A clean desk directly contributes to focus, hygiene, and professional credibility. For office managers and busy professionals, cleaning office desks efficiently means moving beyond a quick wipe-down to a system that protects health and equipment. This guide breaks down effective steps for a thorough clean.
An efficient cleaning routine removes germs from high-touch surfaces and extends the life of office furniture. Below, we show you how to structure your cleaning process, what supplies work best for different materials, and how to maintain results daily.
What You’ll Need to Clean Office Desks Efficiently
Gathering the right tools before you start is the secret to a fast, uninterrupted workflow. You don’t need a cart full of specialized chemicals; you need a focused kit that covers sanitation and surface protection.
The essential supplies are:
- Microfiber cloths (at least three, color-coded if possible)
- A pH-neutral cleaner for general surfaces
- Isopropyl alcohol (70% solution) for electronics
- Disinfectant spray or sanitizing wipes
- A soft-bristled brush or compressed air for keyboards
- Wood polish or a dedicated cleaner for wood finishes
- A duster with an extendable handle
Using one cloth for the entire desk simply moves dirt and bacteria from the keyboard to the clean surface. Separate cloths for electronics, wood, and general surfaces prevent cross-contamination and ensure a residue-free finish.
Step 1: Clear the Desk and Sort Your Belongings
Before any cleaning agent touches the surface, the desk must be completely clear. This is the step most people skip, and it is why their desks never truly feel clean.
Remove everything: monitors, keyboards, papers, photos, and desk organizers. Place small items in a drawer or temporary box. As you move each item, decide: does it belong here, or is it clutter? A minimalist desk setup is easier to maintain and looks more professional.
Once the surface is bare, sort the items into three groups:
- Keep: Items used daily that earn their place on the desk.
- Relocate: Items that belong elsewhere in the office or in a drawer.
- Discard: Trash, old notes, and broken pens that should go straight to the recycling bin or wastebasket.
This five-minute process transforms surface wiping into a genuine reset that supports focus rather than visual clutter.
Step 2: Dust and Clean Surfaces With the Best Cleaning Supplies for Office Furniture
With the desk clear, address the surface itself. The best cleaning supplies depend entirely on the material; using the wrong agent can cause permanent damage.
Here is a material-by-material breakdown of what to use and what to avoid.
Laminate and Metal Desks
Laminate is a plastic-based surface, typically melamine resin over a particle board core. A pH-neutral cleaner (pH 7) is safest; it won’t etch the surface or leave a dull film. Spray onto a microfiber cloth, not the desk, to avoid pooling in seams where moisture can cause swelling.
For metal desks with a powder-coated finish, the same pH-neutral cleaner works well. Avoid ammonia or bleach, which can dull the coating over time. For stainless steel accents, a dedicated cleaner helps, but a damp microfiber cloth followed by a dry buff is often sufficient.
Wood Desks and Veneers
Wood is porous and reactive; the finish, lacquer, polyurethane, or oil, dictates the care. Avoid general-purpose polish, as many contain silicone, which builds up and attracts dust.
For a lacquered or polyurethane-sealed desk, a slightly damp microfiber cloth handles dust. For deeper cleaning, use a cleaner formulated for sealed wood; these are pH-neutral and leave no residue. Avoid alcohol or solvents, which break down the sealant.
For an oil-finished wood desk, oil finishes require periodic re-oiling to maintain moisture balance. A damp cloth removes dust, but follow up with a dry buff. If the surface looks dry, apply a thin coat of furniture oil, let it sit, and buff dry. Never use a water-based cleaner on an oil finish; it can cause swelling and clouding.
Glass Desks
Glass is non-porous and easy to sanitize, but shows every smudge. A solution of 1 part isopropyl alcohol to 3 parts water evaporates quickly and leaves no streaks. Spray onto a microfiber cloth, wipe in a circular motion, and buff dry. Avoid paper towels, which leave lint.
The Chemical Safety Cheat Sheet
To make this practical, here is a quick reference of what to avoid on which surface:
| Cleaner | Laminate | Sealed Wood | Oil-Finished Wood | Glass | Metal |
|---|---|---|---|---|---|
| Bleach | Safe (diluted) | Damages finish | Damages finish | Safe | Can dull coating |
| Ammonia (Windex) | Safe | Strips sealant | Damages finish | Safe | Can dull coating |
| Isopropyl Alcohol | Safe | Strips sealant | Damages finish | Safe | Safe |
| Vinegar (Acetic Acid) | Safe (diluted) | Strips sealant | Damages finish | Safe | Can corrode |
| Abrasive Cleaners | Scratches | Scratches | Scratches | Scratches | Scratches |
| Silicone-based Polish | Leaves film | Builds up | Builds up | Leaves film | Leaves film |
This table is a general guide. Always test any cleaner on an inconspicuous area first. The exact chemical composition of your desk’s finish can vary by manufacturer, and a patch test is the only way to be certain.

A disinfectant wipe perfect for a metal filing cabinet can ruin a wood veneer. Professional teams often carry a selection of products rather than a single “universal” spray, matching the chemical agent to the material’s finish.
Step 3: How to Disinfect Computer Keyboards and Mice
Keyboards and mice are among the most germ-heavy items in any office, touched constantly and rarely cleaned properly. A simple wipe-down isn’t enough; an effective protocol treats each type differently.
First, unplug the devices or turn them off. For a wireless keyboard, remove the batteries if possible. This prevents accidental input and protects the circuitry from static discharge.
Second, remove loose debris. Turn the keyboard upside down and gently tap it. Use compressed air to blow out crumbs and dust from between the keys; a soft-bristled brush works for stubborn debris. This prevents grinding debris into the surface during wet cleaning. protecting office countertops.
Cleaning Different Keyboard Types
Membrane Keyboards: These are the most common office keyboards, with keys part of a single rubber or silicone mat. They are relatively sealed, but liquid can seep between keys. Use a damp (not dripping) 70% isopropyl alcohol cloth to wipe keycaps and frame. For deeper cleaning, pry off keycaps with a puller and soak them in soapy water; rinse and dry completely before reattaching.
Mechanical Keyboards: These have individual switches under each keycap and are more vulnerable to liquid ingress. The same 70% isopropyl alcohol wipe-down is safe for keycaps and plate, but liquid in the switches risks corrosion. For deep cleaning, remove all keycaps and use compressed air to blow out debris. A sticky switch may need a contact cleaner, but that is advanced repair, not routine maintenance.
Laptop Keyboards: These are the most delicate; keycaps are held on by small plastic clips that break easily. Do not pry them off unless you have a replacement kit. For routine cleaning, dust with a dry microfiber cloth, then use a slightly damp cloth with 70% isopropyl alcohol. Be careful around edges where liquid can seep into the motherboard.
Cleaning Mice
Mice have different vulnerabilities. Optical and laser sensors are sensitive; use a cotton swab dampened with 70% isopropyl alcohol to gently clean the lens. Do not scrape it with a sharp object. Clean the scroll wheel and housing with an alcohol-dampened swab.
The 70% Isopropyl Alcohol Standard
70% isopropyl alcohol is the sweet spot for disinfection (the CDC). Higher concentrations (like 90%) evaporate too quickly to kill bacteria effectively (peer-reviewed research). The 30% water content helps the alcohol penetrate bacterial cell walls, making it more effective while still evaporating fast enough to be safe for electronics (PubMed).
Never spray cleaning liquid directly onto a keyboard or mouse. Liquid will seep into the circuitry and can cause short circuits or permanent failure. Always apply the solution to a cloth first. Also, never use a bleach-based cleaner on electronics; it is corrosive to metal contacts and can damage plastic housings.
The UV-C Light Alternative
Some offices use UV-C light sanitizing wands or boxes as a no-liquid alternative. These devices damage the DNA of bacteria and viruses, but they only work on surfaces directly exposed to light, so shadows from keycaps can shield germs. They also do not remove physical dirt. UV-C devices are a useful supplement, not a replacement for the alcohol wipe-down method.
Allow all surfaces to air-dry completely before reconnecting. Tailoring your approach to your specific keyboard and mouse type ensures a thorough clean without costly damage.
Step 4: Tackle Stains and Spills on Different Desk Materials
Spills happen. Coffee rings, ink marks, and sticky residue are inevitable in a busy office. The key is speed and using the correct technique for the material.
For fresh liquid spills on wood, blot immediately with a dry microfiber cloth; rubbing spreads liquid into the grain. Once blotted, clean with a damp cloth and dry thoroughly to prevent water rings.
For stubborn stains like coffee or ink, use a spot cleaning approach. On laminate, a paste of baking soda and water applied gently with a soft cloth lifts stains without scratching. On wood, use a dedicated wood cleaner. Avoid abrasive pads; they create micro-scratches that trap dirt and dull the finish.
For sticky residue from tape or labels, apply isopropyl alcohol to a cloth and rub gently. It dissolves the adhesive without harming most surfaces.
Step 5: Organize Cables and Accessories to Prevent Clutter
Cleaning is only half the battle; keeping the desk organized prevents the mess from returning. Cable management is the most impactful step.
Tangled cables collect dust, make cleaning harder, and create visual noise. Invest in simple solutions like cable clips, sleeves, or an under-desk tray to route cables out of sight.
A simple organization system includes:
- A desk organizer for pens, notes, and small accessories
- A paper filing system or in-tray to keep documents off the surface
- A cable management kit to bundle and route wires
- A small tray for frequently used items like phone chargers
Once these systems are in place, daily cleaning takes under two minutes because there is nothing to move. This proactive approach is more effective than any cleaning product at maintaining an ergonomic workspace.
Your Daily Office Cleaning Routine for Lasting Results
The most efficient cleaning strategy is prevention. A daily routine of two to three minutes eliminates the need for frequent deep cleans.
A practical daily routine looks like this:
- At the end of the day, clear the surface of any loose papers or trash.
- Wipe the desk surface with a sanitizing wipe or a damp microfiber cloth.
- Give the keyboard and mouse a quick pass with an alcohol-dampened cloth.
- Straighten your desk organizer and file away any documents.
This routine is about maintenance, not deep cleaning. Addressing dust and debris daily prevents buildup that requires harsh chemicals and heavy scrubbing later.
Keep a small pack of sanitizing wipes and a microfiber cloth in your desk drawer. If you can clean without leaving your chair to find supplies, you are far more likely to do it consistently.
Common Mistakes to Avoid When Cleaning Desks
Even with the best intentions, people make errors that damage furniture or fail to sanitize the surface. Avoiding these pitfalls improves results immediately.
Mistake 1: Using the same cloth for everything. This spreads bacteria. Use separate cloths for the keyboard, desk surface, and monitor.
Mistake 2: Over-saturating surfaces. Excess liquid is the enemy of electronics and wood. Always apply cleaners to a cloth, not directly to the item.
Mistake 3: Ignoring the monitor. Screens attract dust and fingerprints. Use a dry microfiber cloth or screen-specific cleaner. Never use glass cleaner or paper towels, which strip anti-glare coatings.
Mistake 4: Forgetting the “hidden” areas. The underside of the desk edge, mouse pad, and phone handset are high-touch areas often neglected. Include them in your routine.
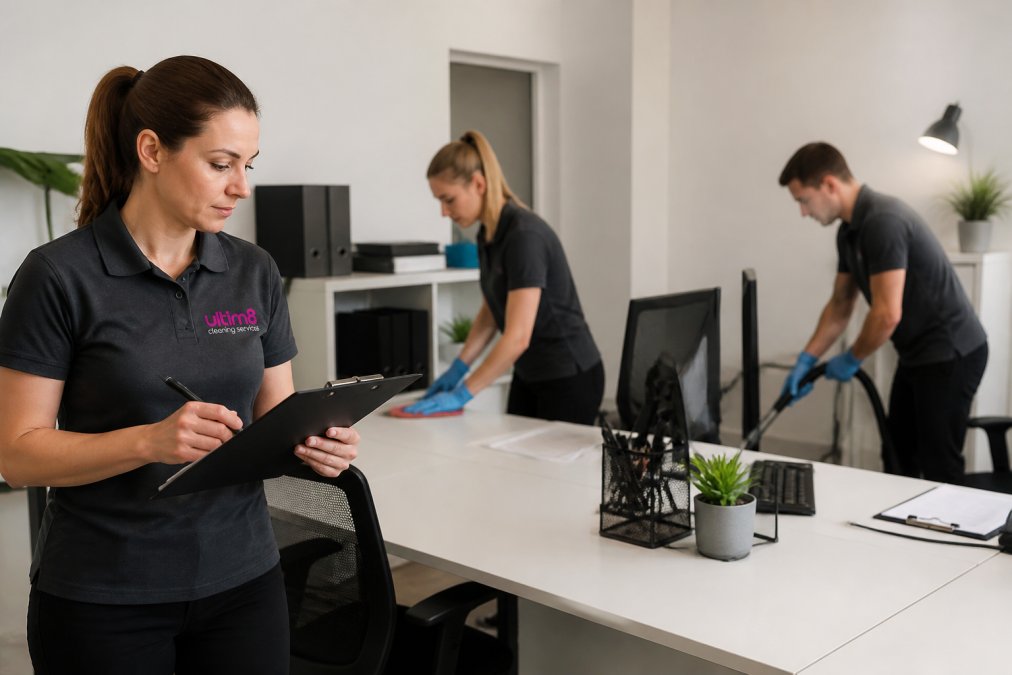
By sidestepping these errors, you ensure your efforts result in a cleaner, healthier workspace. This level of detail is what professional services like Ultim8 Cleaning Services bring to every office.
A truly clean office desk is the result of a system, not a single effort. By gathering the right supplies, matching cleaners to materials, and committing to a short daily routine, you can maintain a workspace that supports productivity and health. When the demands of running an office leave no time for this level of detail, Ultim8 Cleaning Services provides insured, background-checked cleaners who work through detailed checklists. Get started with Ultim8 Cleaning Services and reclaim the time you spend on cleaning for the work that matters.
Frequently Asked Questions
What is the most efficient way to clean an office desk?
The most efficient way is to follow a top-down, left-to-right system. First, clear everything off the desk. Then, dust the entire surface with a microfiber cloth. Next, apply a pH-neutral cleaner to a fresh cloth and wipe down the main surface. Finally, sanitize high-touch items like the keyboard and mouse. This method prevents re-cleaning areas and ensures you don’t miss spots.
How often should office desks be sanitized?
For general office hygiene, desks should be cleaned daily and disinfected at least once per day, focusing on high-touch areas. If a desk is shared or someone is sick, it needs sanitizing between each user. A quick daily wipe-down with a disinfectant or sanitizing wipe is the most practical way to maintain a hygienic workstation.
What should I use to clean my computer keyboard and mouse?
Never spray liquid directly on electronics. Power down the device and unplug it. Turn the keyboard upside down and gently shake out debris. Use compressed air to remove dust between keys. For disinfection, lightly dampen a microfiber cloth with 70% isopropyl alcohol and wipe all surfaces. Make sure the cloth is only slightly damp, not wet, to prevent damage.
What are the best cleaning supplies for office furniture?
The best supplies are gentle but effective. You need microfiber cloths for dusting and wiping. For cleaning, use a pH-neutral cleaner which is safe for most surfaces. For disinfection, use 70% isopropyl alcohol or disinfectant wipes. Keep a separate wood polish for wood desks and a dedicated glass cleaner for glass tops. Avoid harsh abrasives and bleach.
This article was written using GrandRanker